OAuth with Google
Enable Google Sign-In for InstaCRUD users. This guide walks through setting up OAuth 2.0 credentials in Google Cloud Console.
Overview
Google OAuth allows users to:
- Sign in with their Google account
- Skip manual registration
- Use their existing Google identity
Step 1: Create Google Cloud Project
- Go to Google Cloud Console
- Create a new project or select an existing one
- Note your Project ID
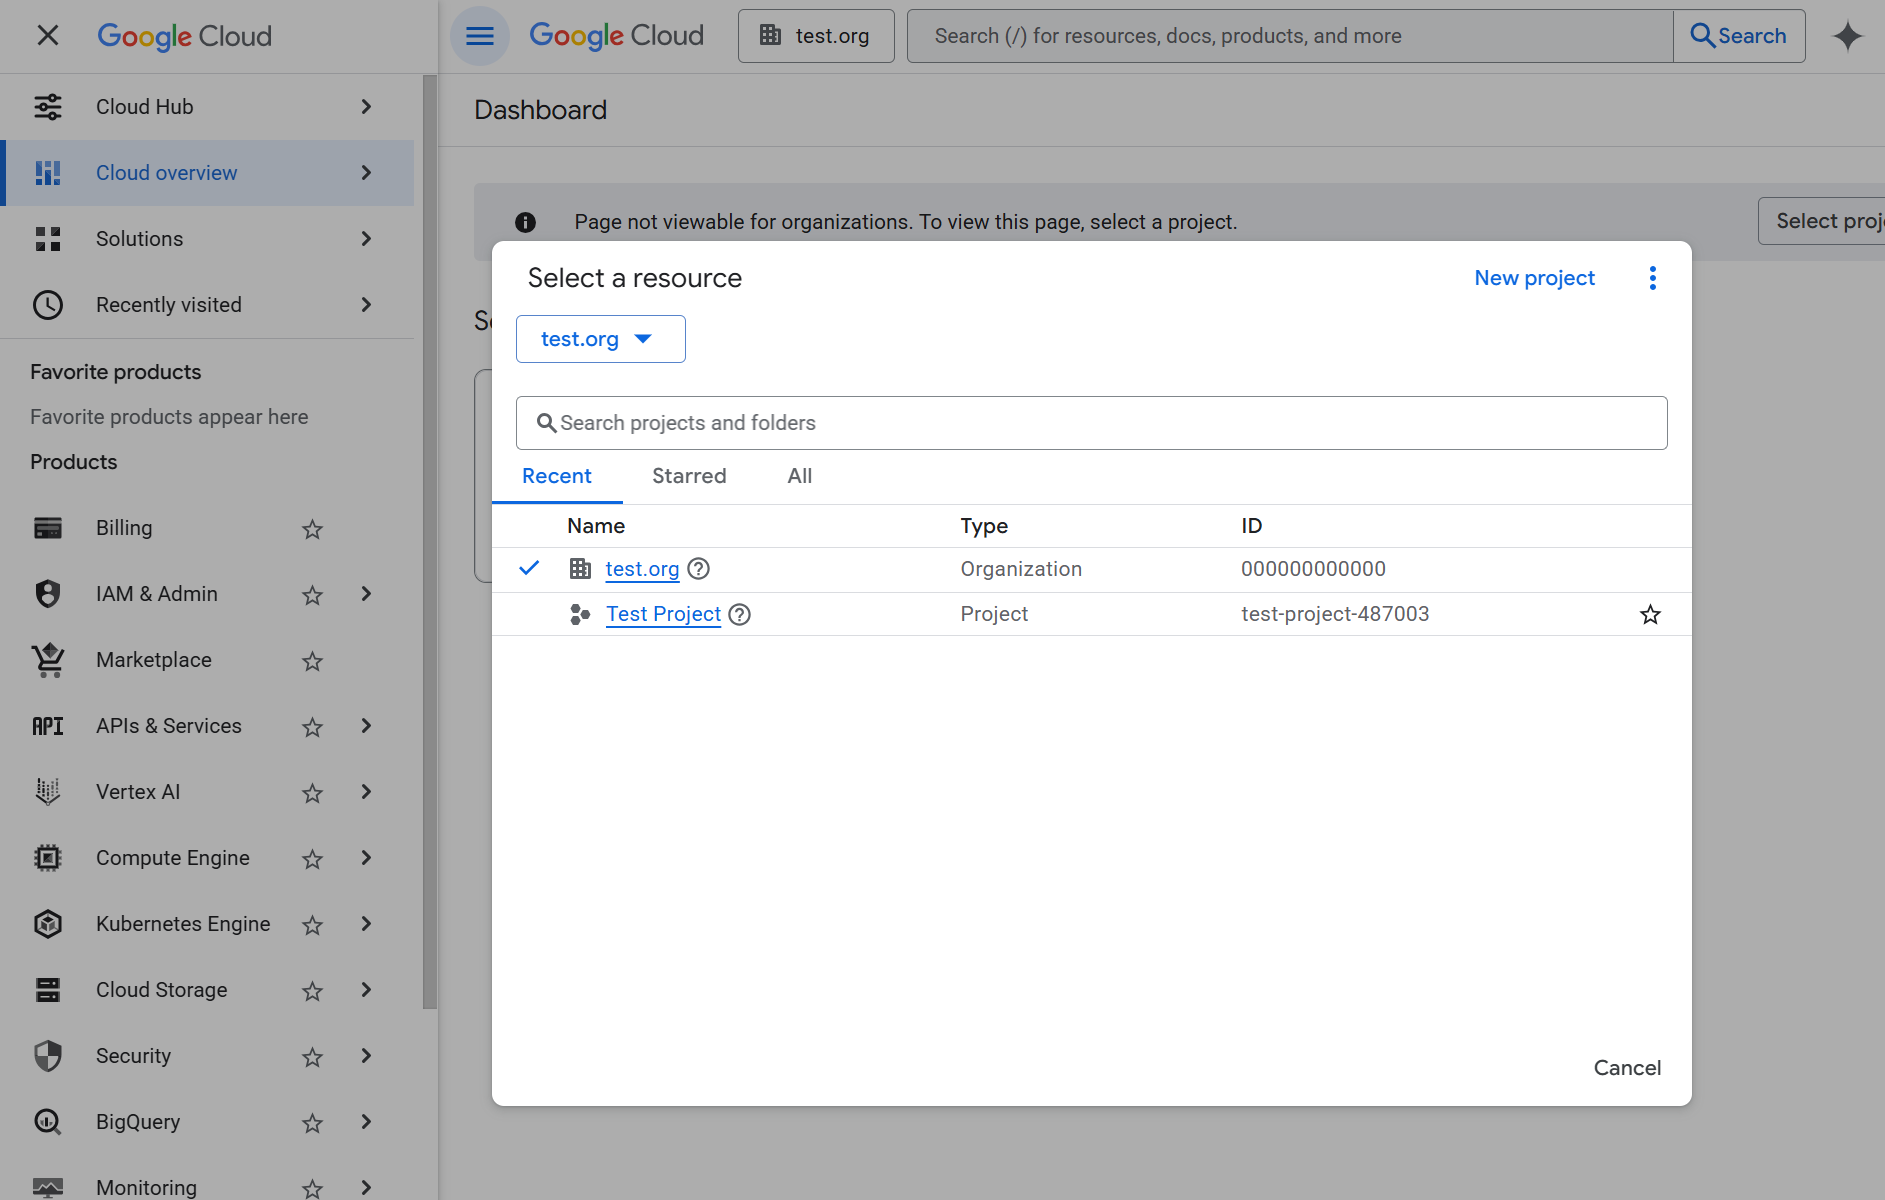 Google Cloud Console project selector. Use an existing project or click New Project to create one for InstaCRUD.
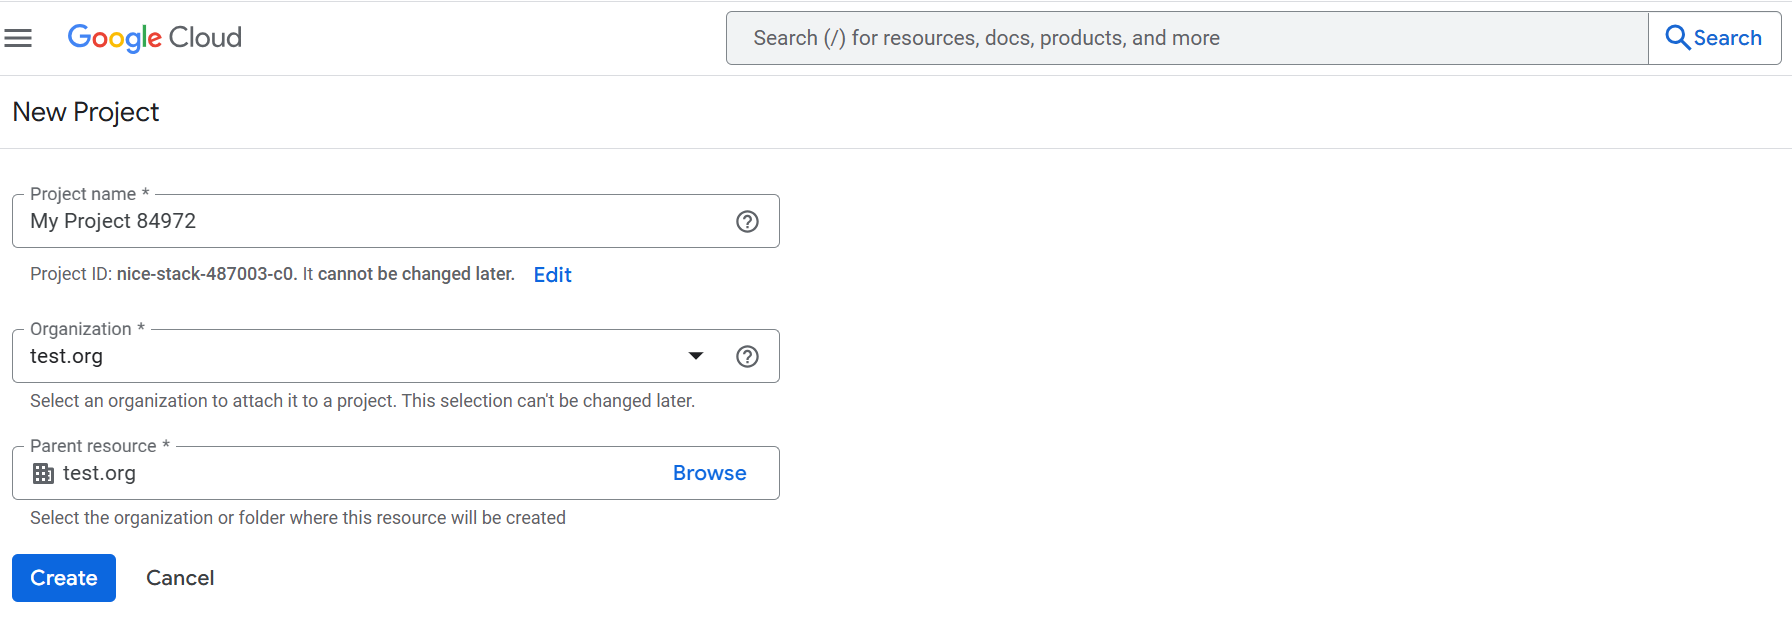 Creating a new Google Cloud project. Save the Project ID � it will be used internally by Google.
Step 2: Configure OAuth Consent Screen
- Navigate to APIs & Services > OAuth consent screen
- Click Get started button to configure OAuth
- Fill in App Information fields:
- App name: Your application name
- User support email: Your email
- Select External user type (or Internal for Google Workspace)
- Fill in Contact Information fields:
- Email addresses: Your email(s)
- Check in I agree to the Google API Services: User Data Policy
- Click Create
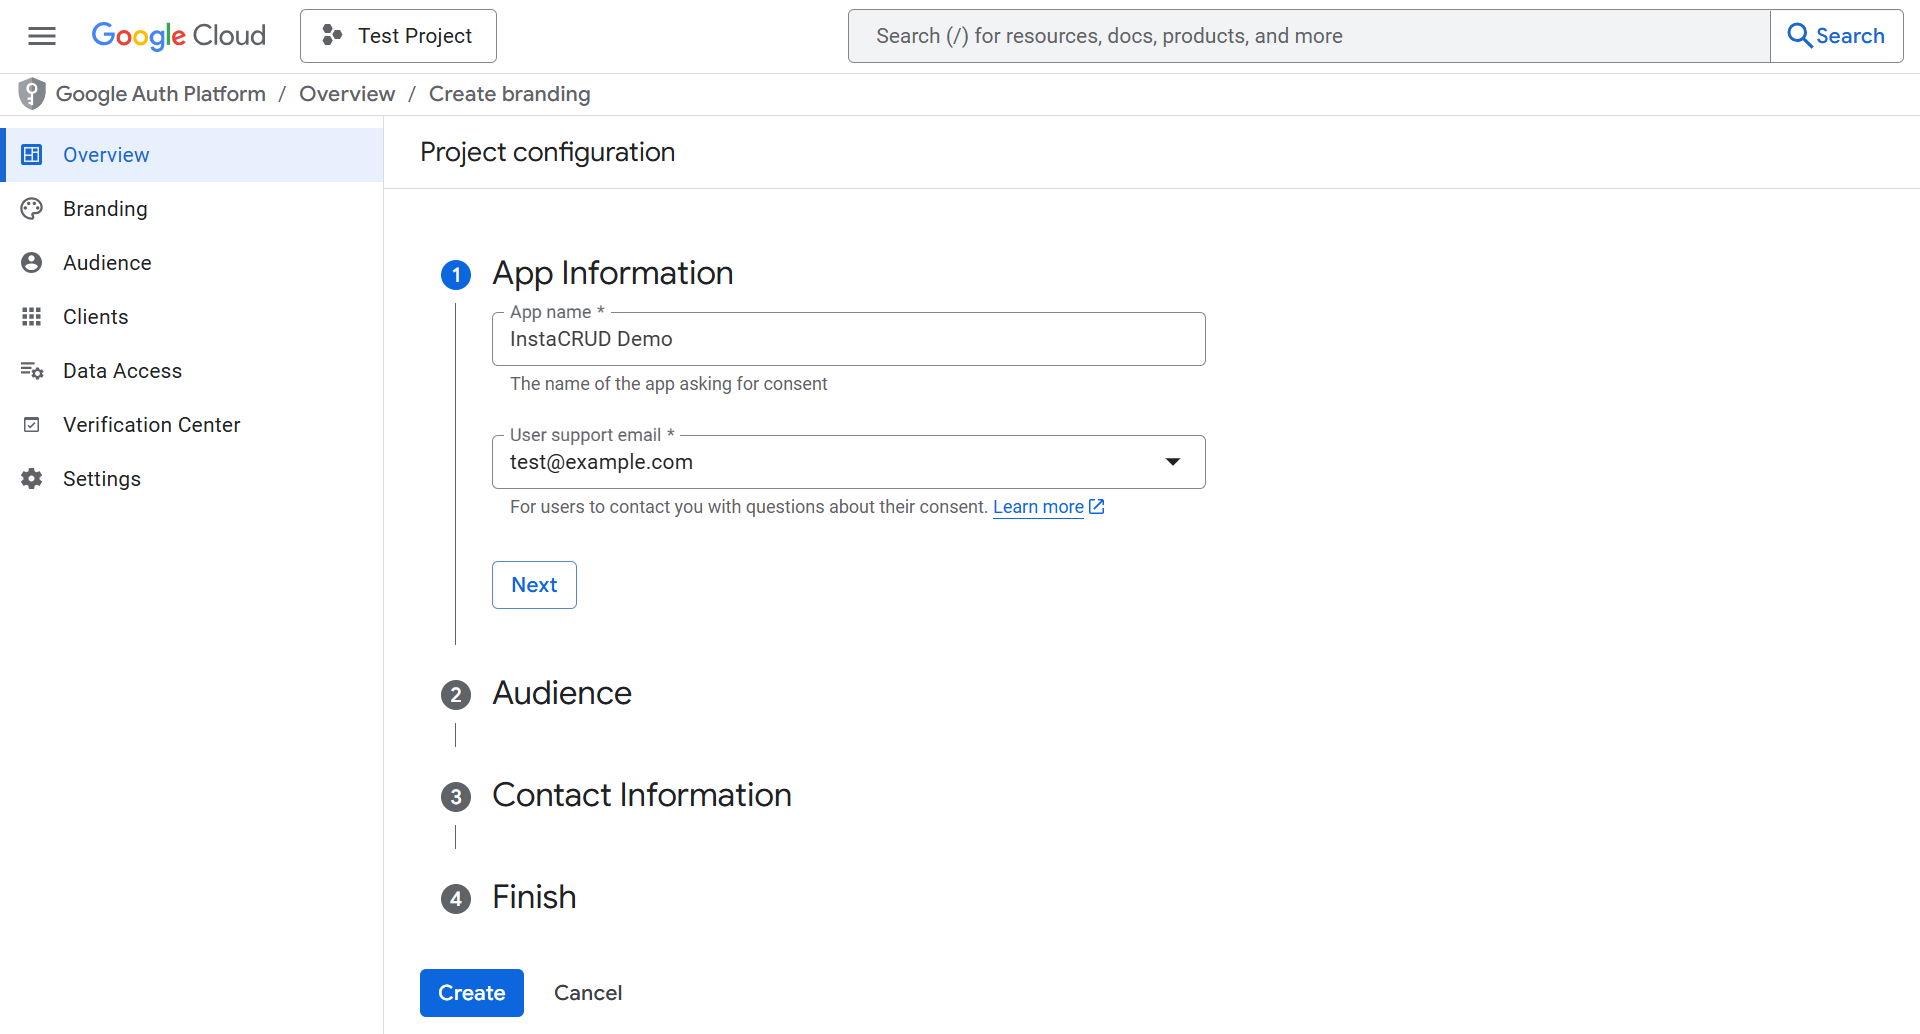 OAuth consent screen configuration. Enter your application name and support email.
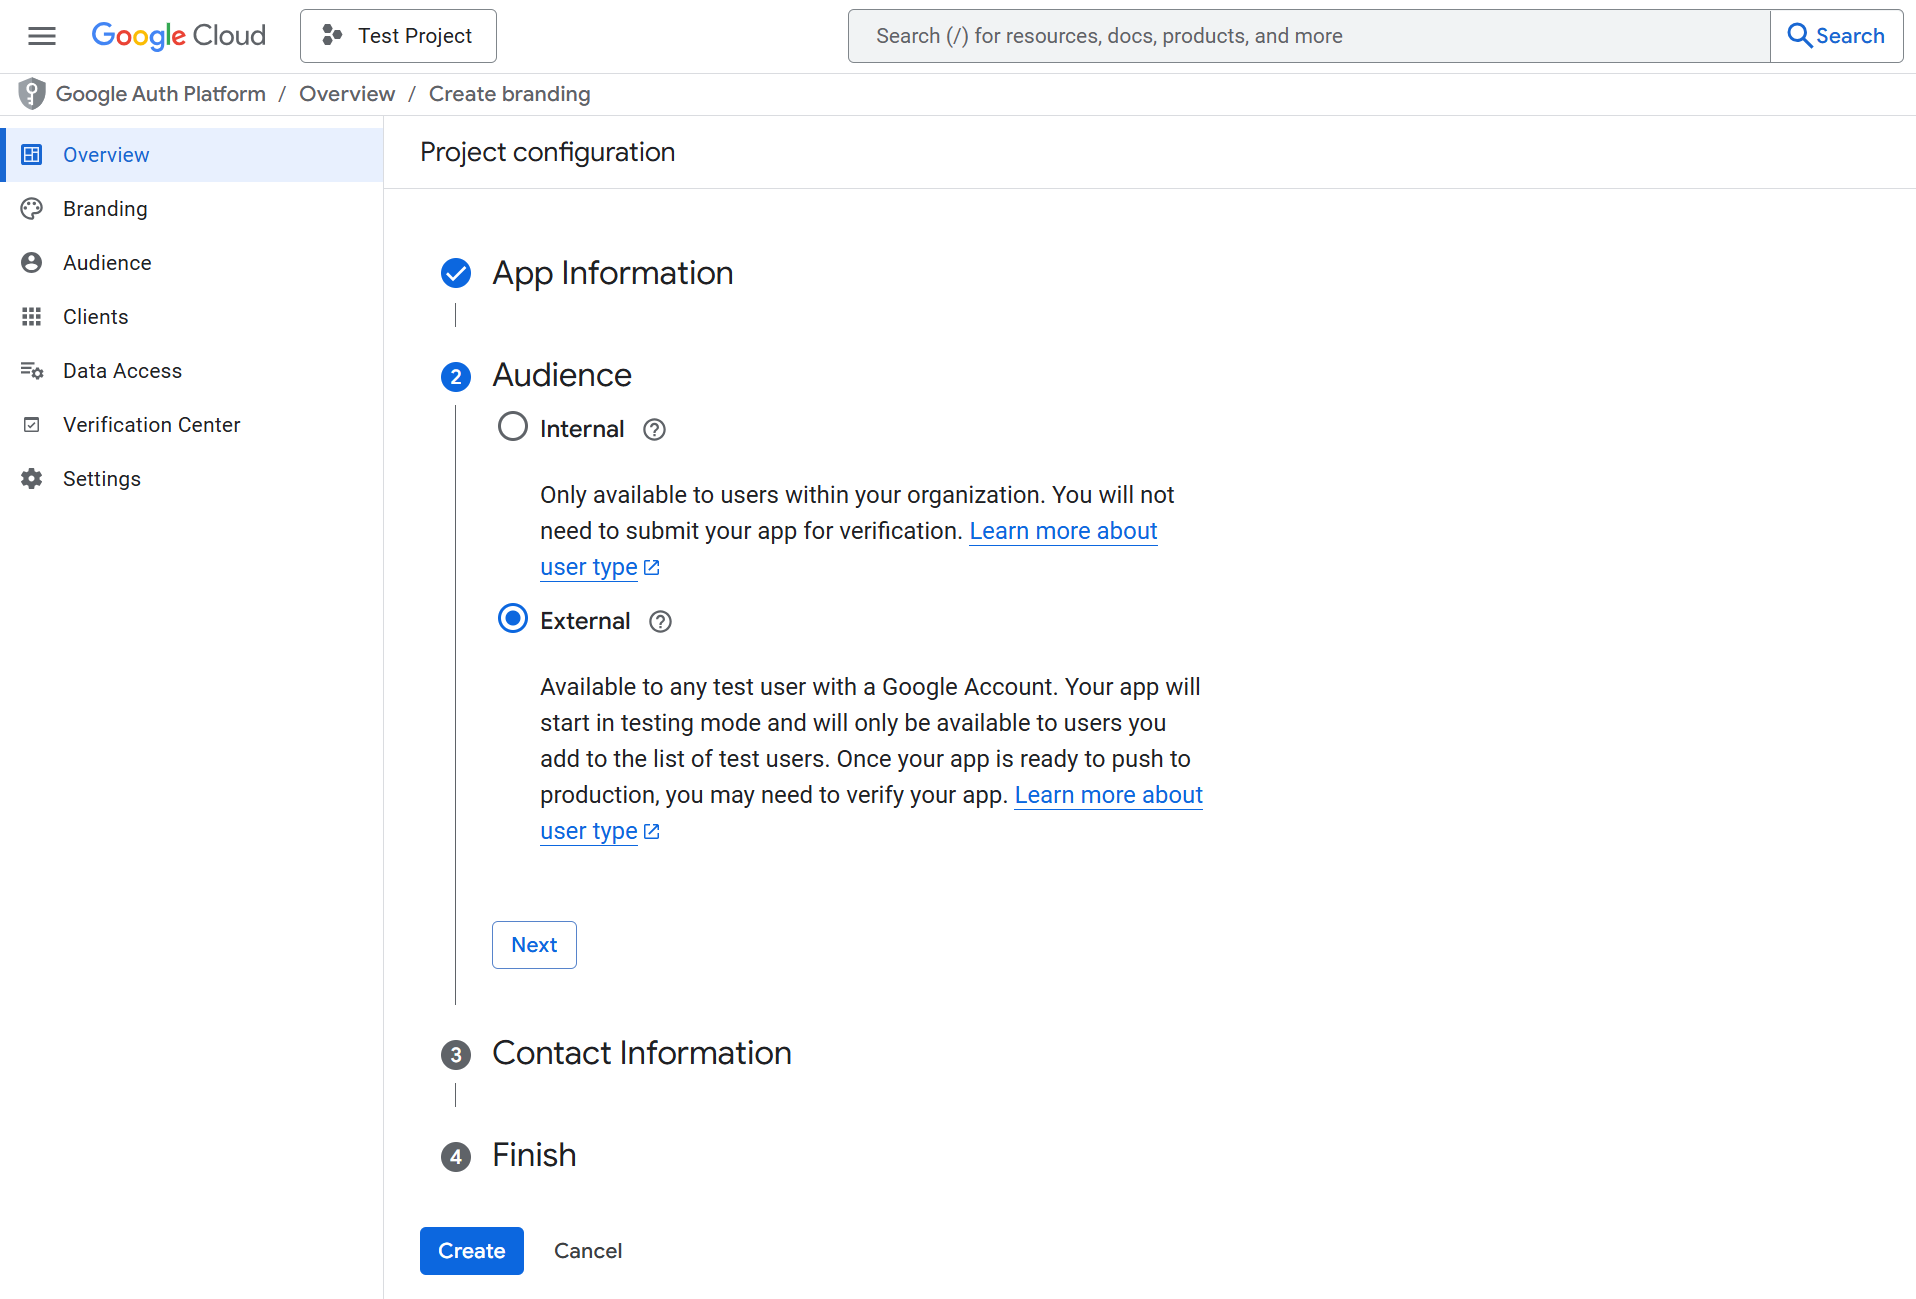 Selecting the OAuth user type. Choose External to allow any Google account to sign in.
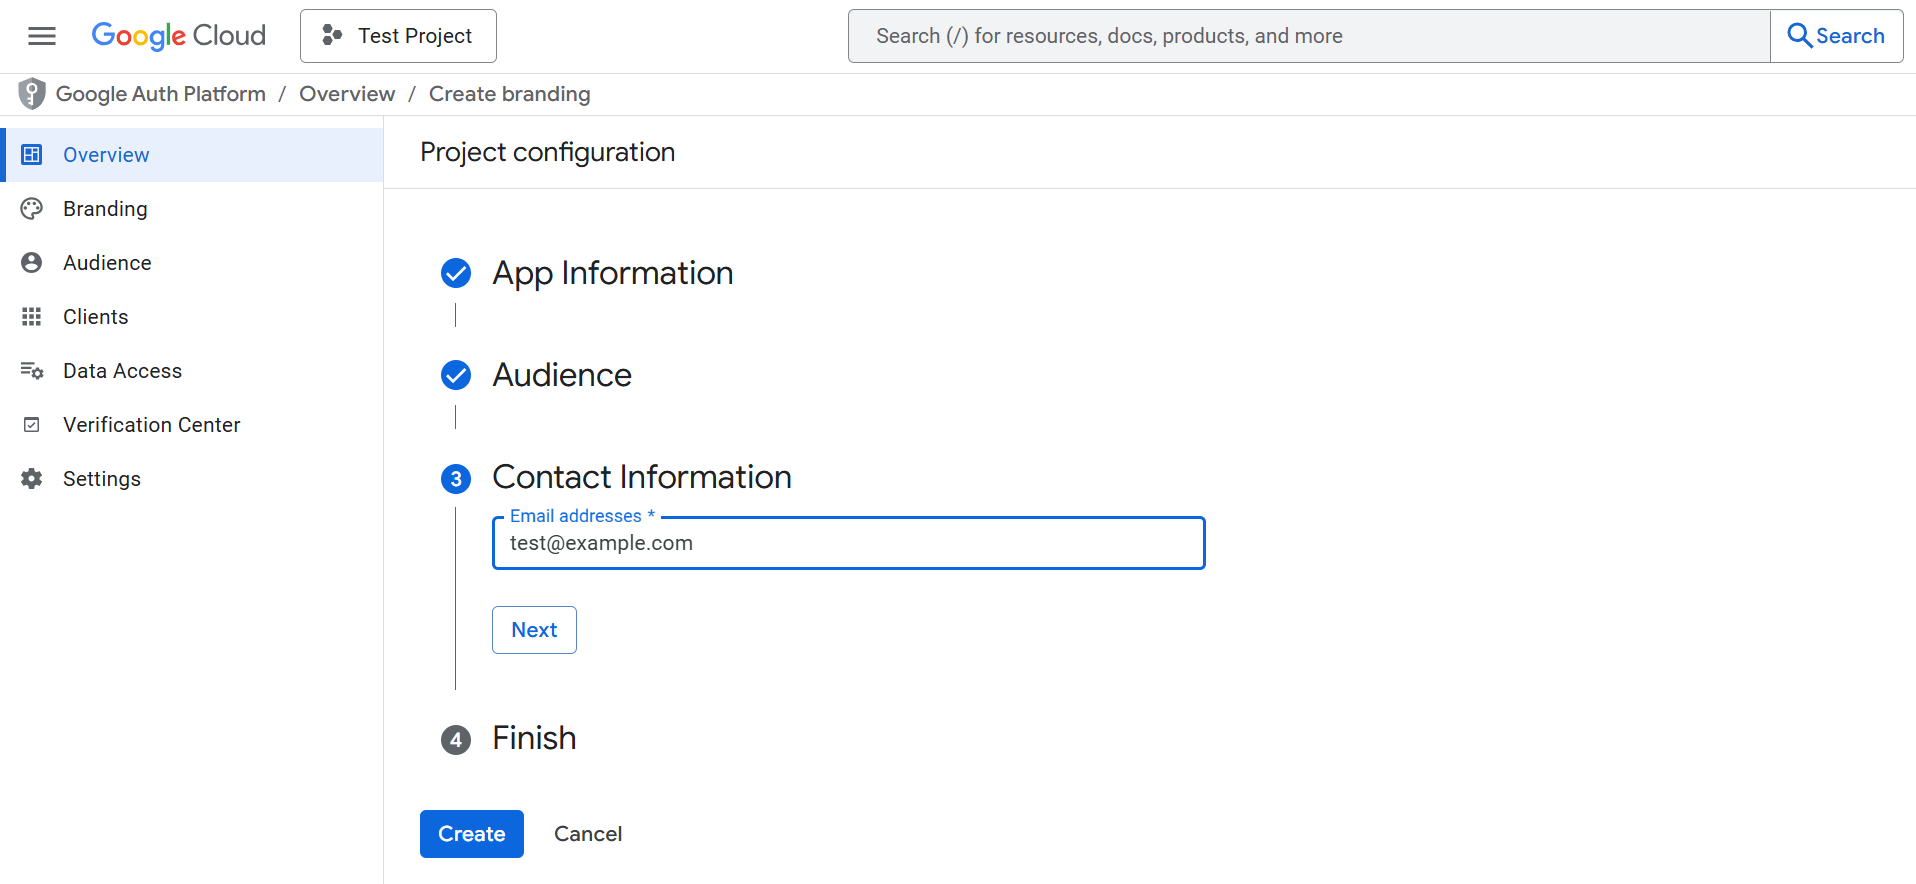 Enter contact emails.
Scopes
Add these scopes:
emailprofileopenid
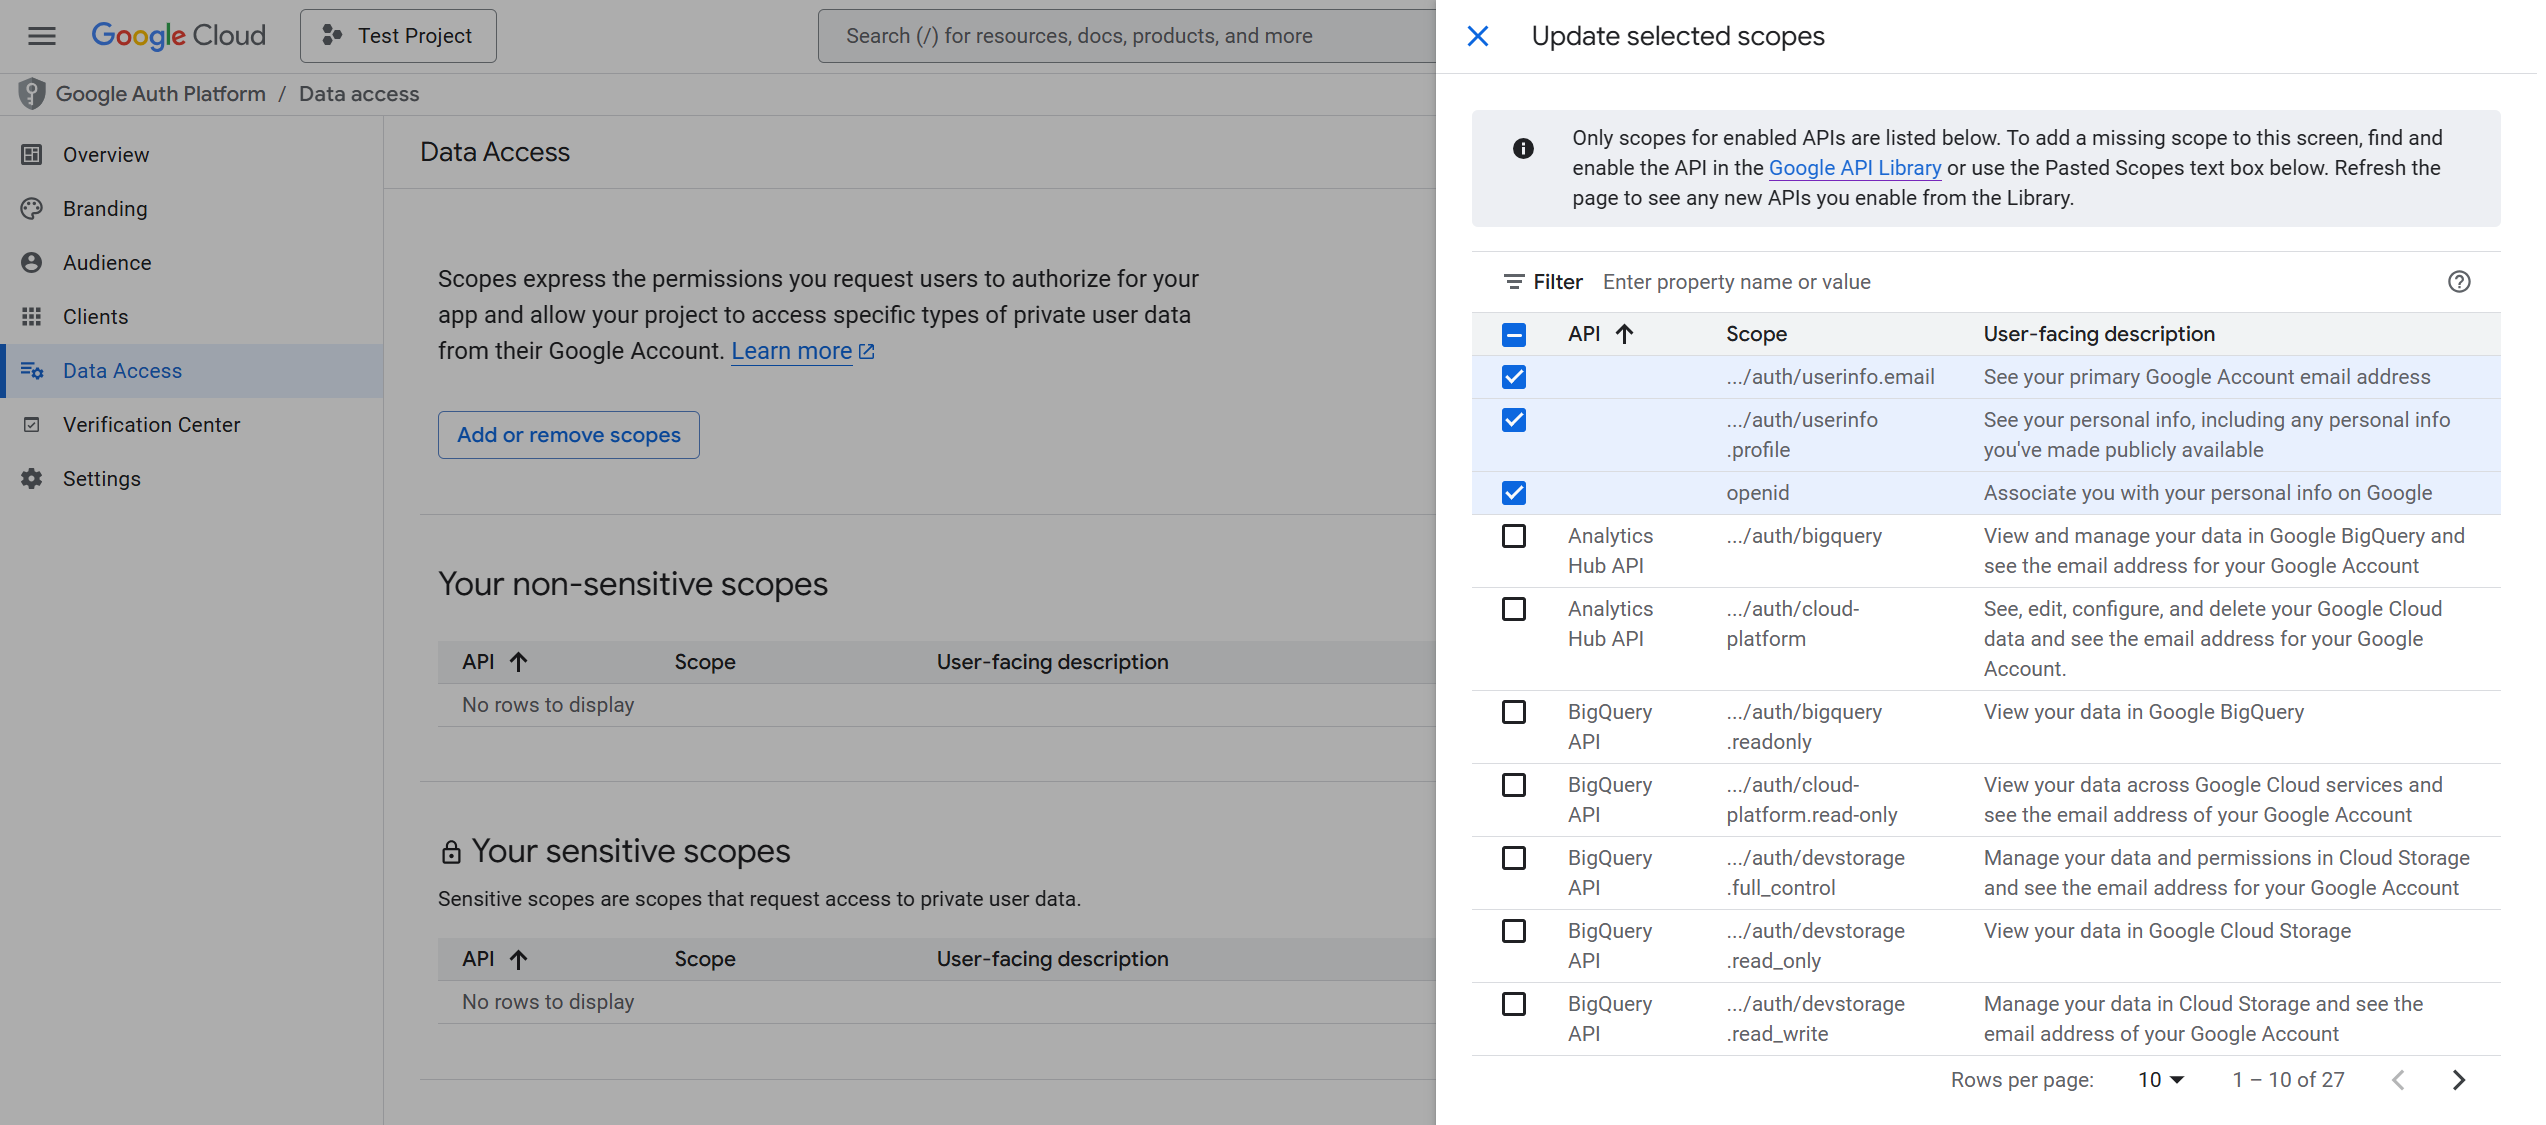 Update selected scopes.
Test Users (Development)
While in testing mode, add email addresses of users who can test the OAuth flow.
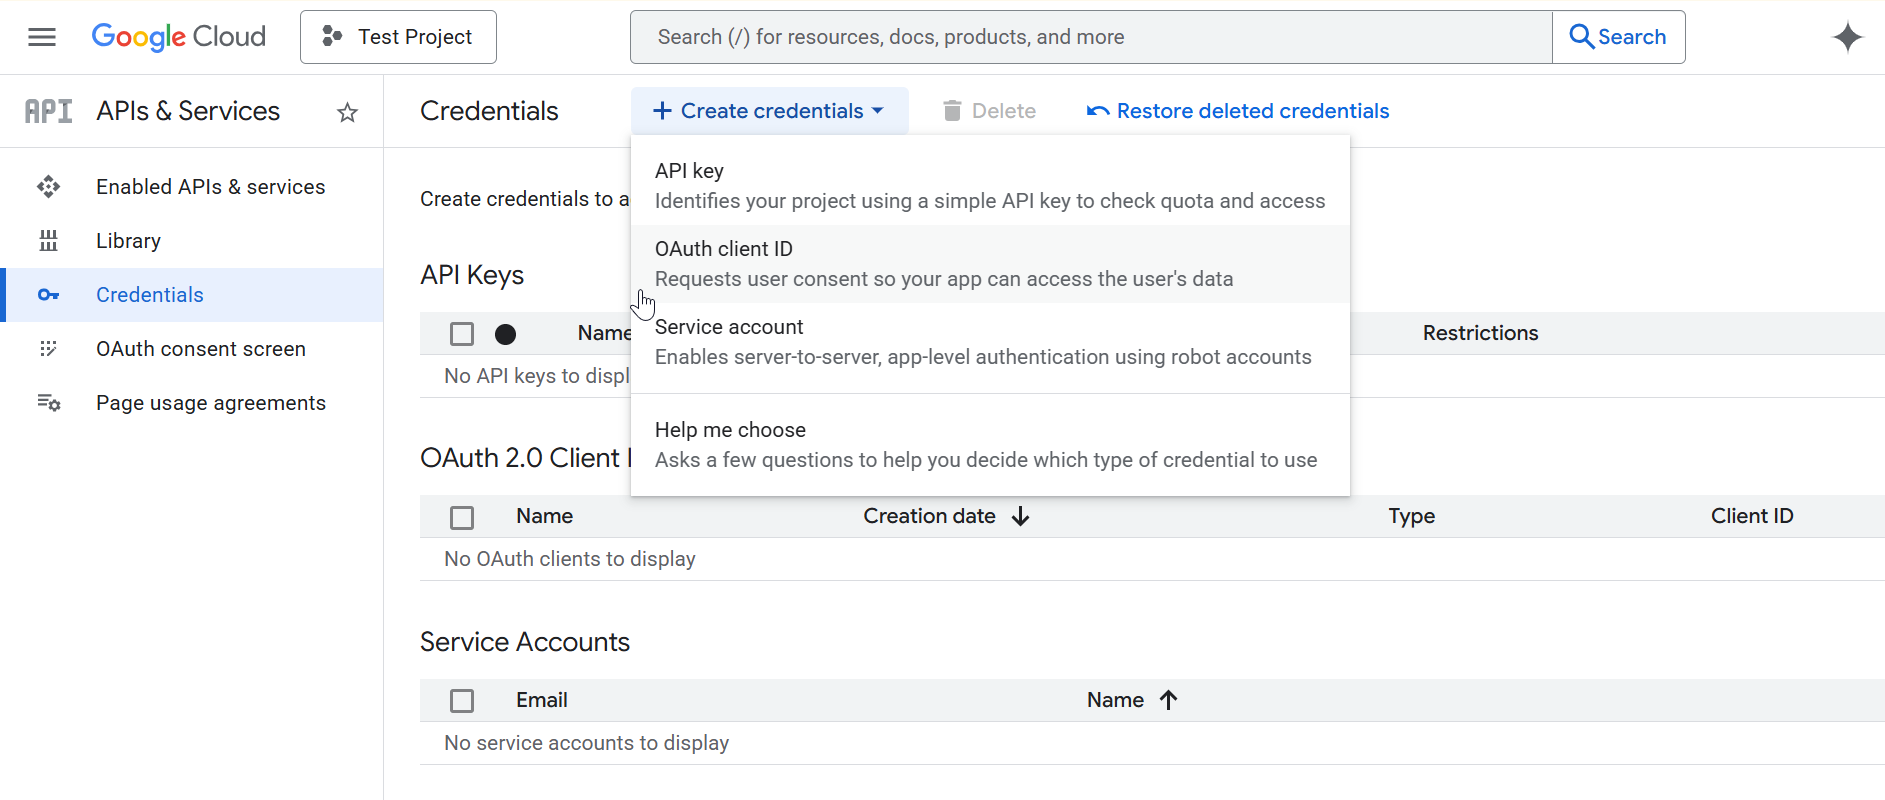
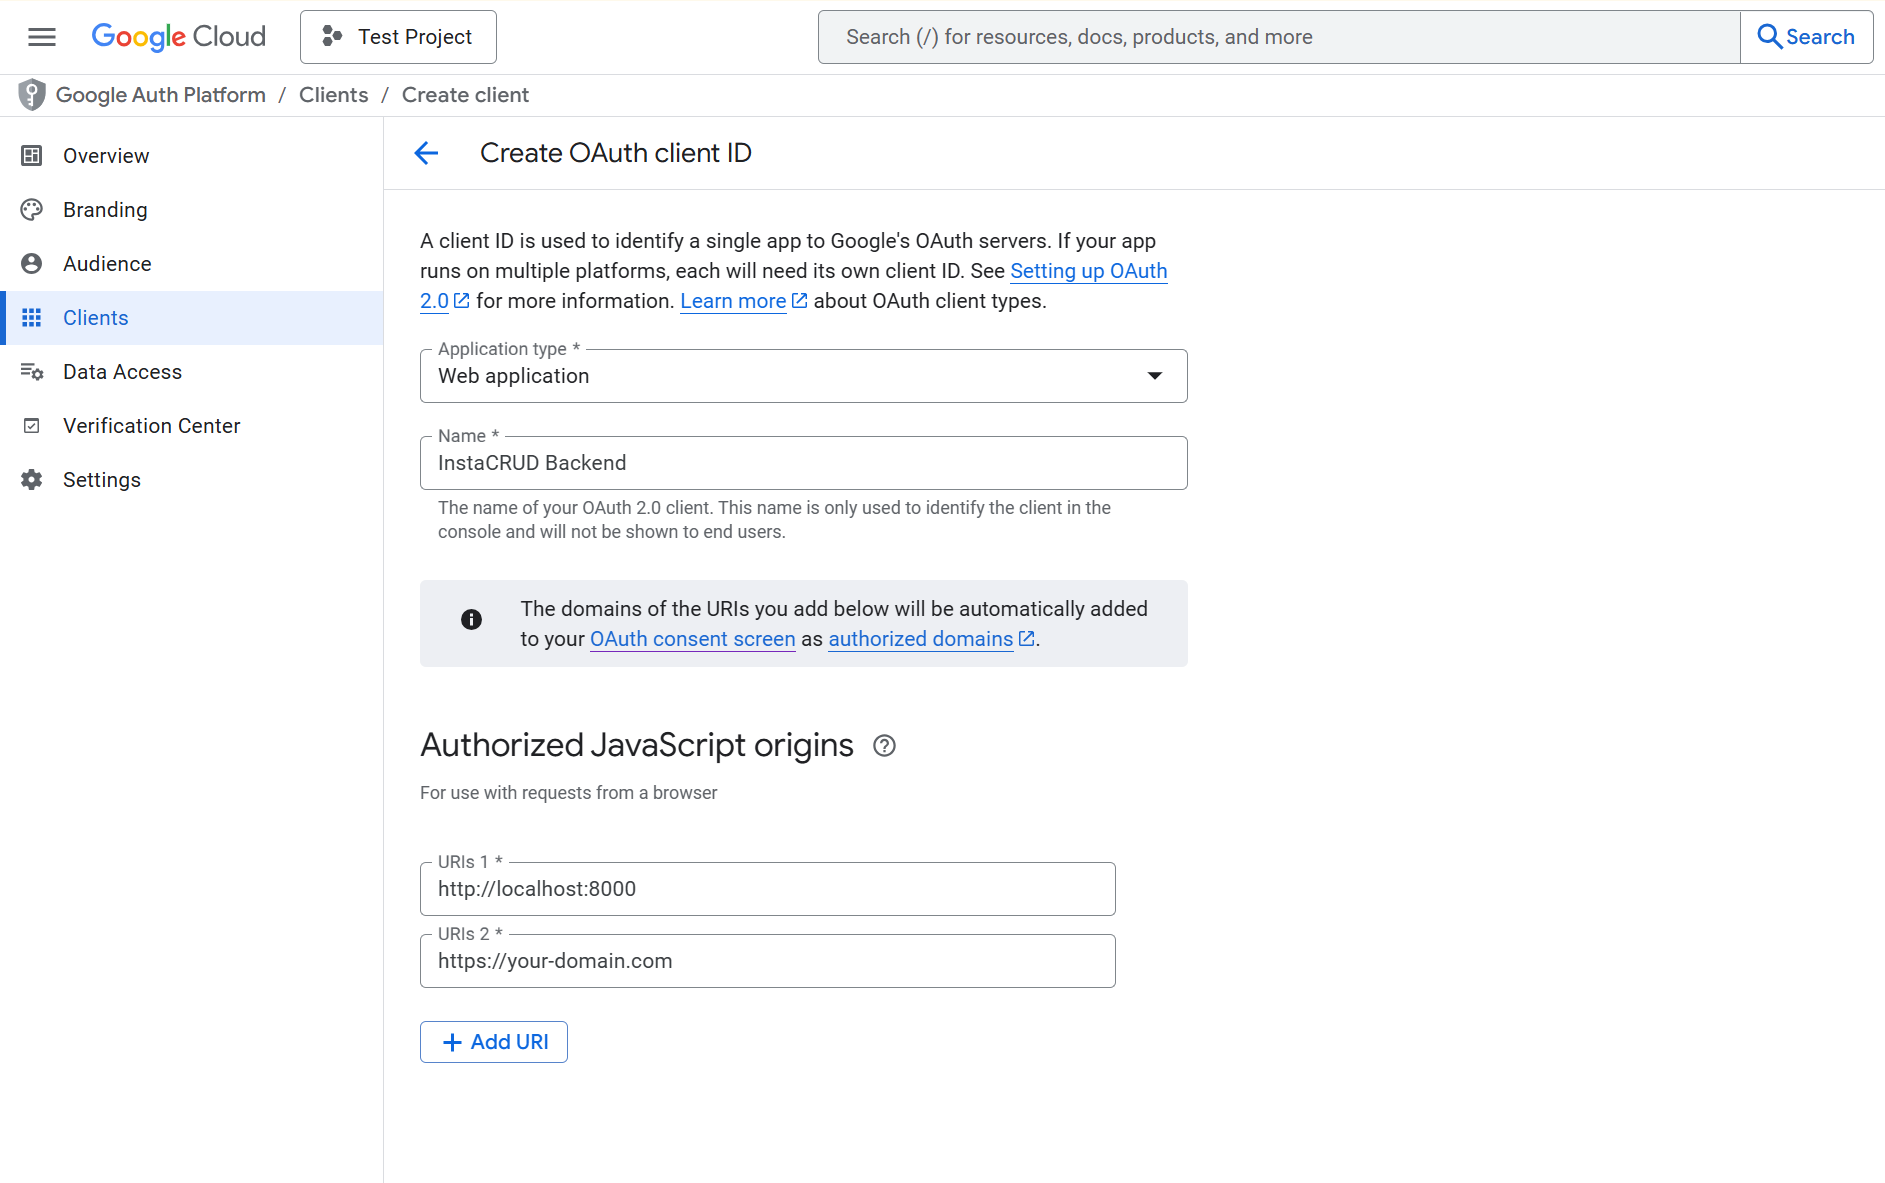
Step 3: Create OAuth Credentials
-
Go to APIs & Services > Credentials
-
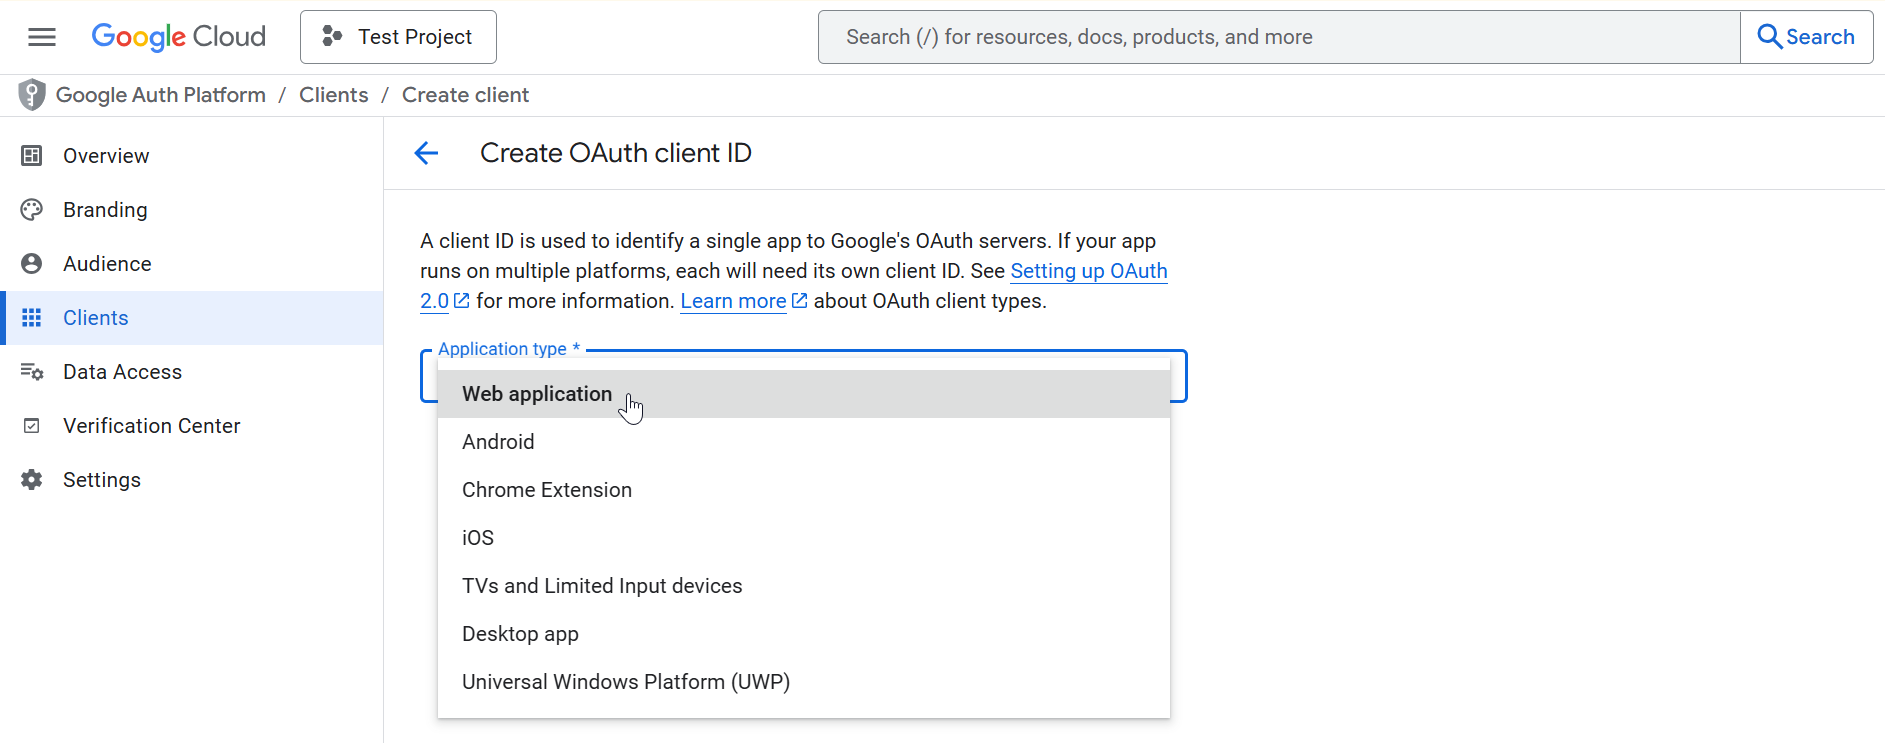
Click Create Credentials > OAuth client ID
-
Select Web application
-
Configure:
- Name: InstaCRUD Backend
- Authorized JavaScript origins:
http://localhost:3000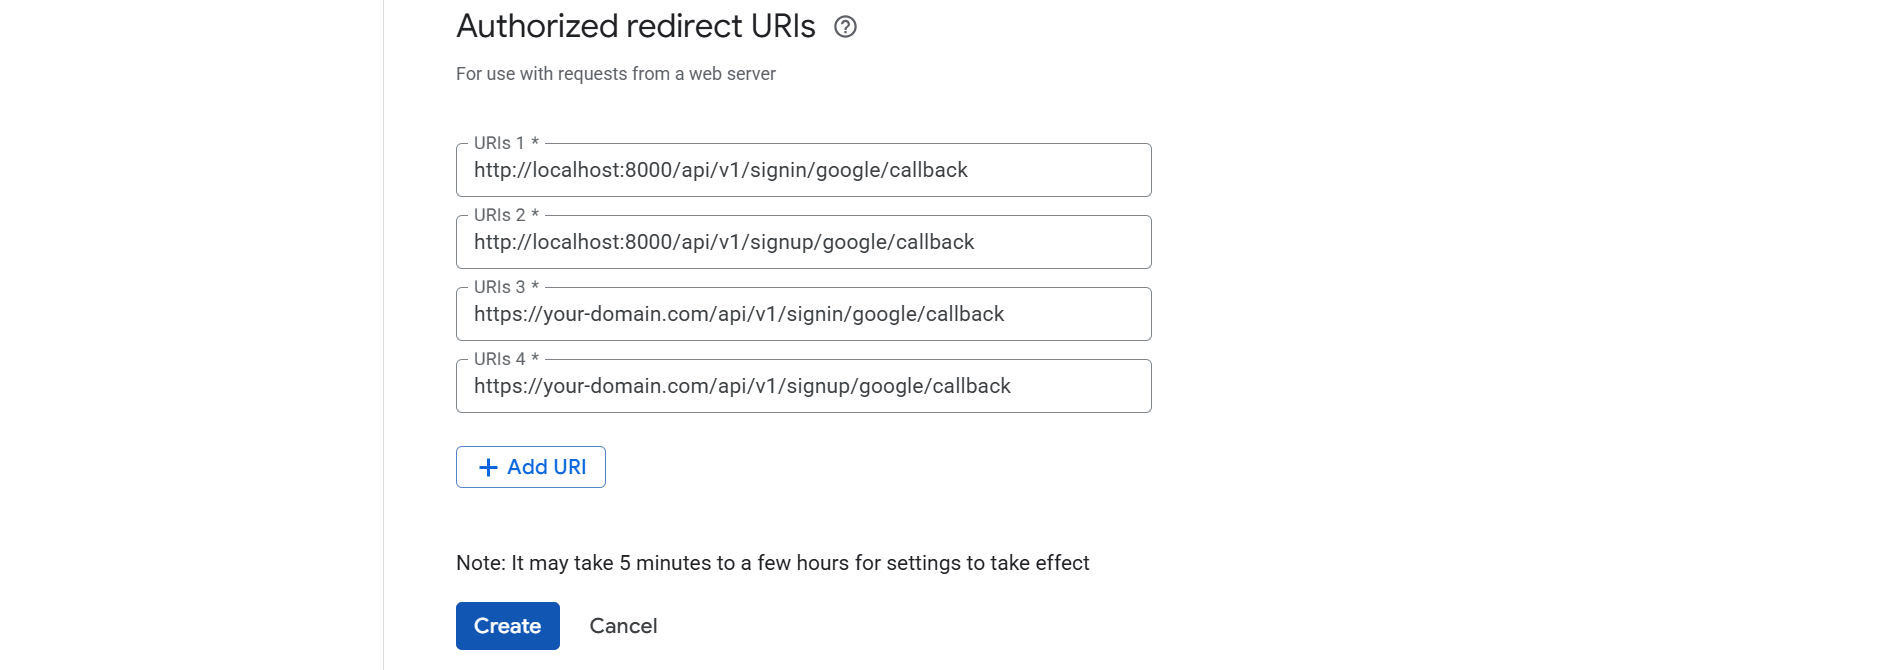
https://your-domain.com - Authorized redirect URIs:
http://localhost:8000/api/v1/signin/google/callback
http://localhost:8000/api/v1/signup/google/callback
https://your-domain.com/api/v1/signin/google/callback
https://your-domain.com/api/v1/signup/google/callback
-
Click Create
-
Copy the Client ID and Client Secret
Step 4: Configure InstaCRUD
Add credentials to your backend .env file:
# Google OAuth
GOOGLE_CLIENT_ID=your-client-id.apps.googleusercontent.com
GOOGLE_CLIENT_SECRET=your-client-secret
Step 5: Verify Configuration
Restart the backend server. The OAuth endpoint should be available:
GET /api/v1/signin/google
This redirects users to Google's consent screen.
Environment-Specific URLs
Local Development
Authorized JavaScript origins:
  http://localhost:3000

Authorized redirect URIs:
  http://localhost:8000/api/v1/signin/google/callback
  http://localhost:8000/api/v1/signup/google/callback
ngrok Development
Authorized JavaScript origins:
  https://your-frontend.ngrok-free.app

Authorized redirect URIs:
  https://your-backend.ngrok-free.app/api/v1/signin/google/callback
  https://your-backend.ngrok-free.app/api/v1/signup/google/callback
Production
Authorized JavaScript origins:
  https://app.your-domain.com

Authorized redirect URIs:
  https://api.your-domain.com/api/v1/signin/google/callback
  https://api.your-domain.com/api/v1/signup/google/callback
Publishing to Production
To allow any Google user to sign in:
- Go to OAuth consent screen
- Click Publish App
- Complete verification if required (for sensitive scopes)
Without publishing, only test users can authenticate.
Troubleshooting
"Access Blocked" Error
- Verify redirect URI matches exactly (including trailing slashes)
- Check that the user is added as a test user (if in testing mode)
"Invalid Client" Error
- Verify Client ID and Secret are correct
- Ensure no extra whitespace in environment variables
Callback URL Mismatch
- The redirect URI in Google Console must match
BASE_URL/api/v1/signin/google/callbackexactly - Include both HTTP (development) and HTTPS (production) URLs
Summary
Google OAuth configuration requires:
- Google Cloud project with OAuth consent screen
- OAuth 2.0 credentials (Client ID + Secret)
- Correct redirect URIs for each environment
- Environment variables in InstaCRUD backend